Keycloak Integration
This page describes how to set up a Keycloak client to integrate with Certifai.
For additional instructions and form updates for subsequent versions refer to the latest Keycloak documentation portal.
Step 1: Create a Client
- Login to your Keycloak Admin Console.
- Click Clients in the left panel.
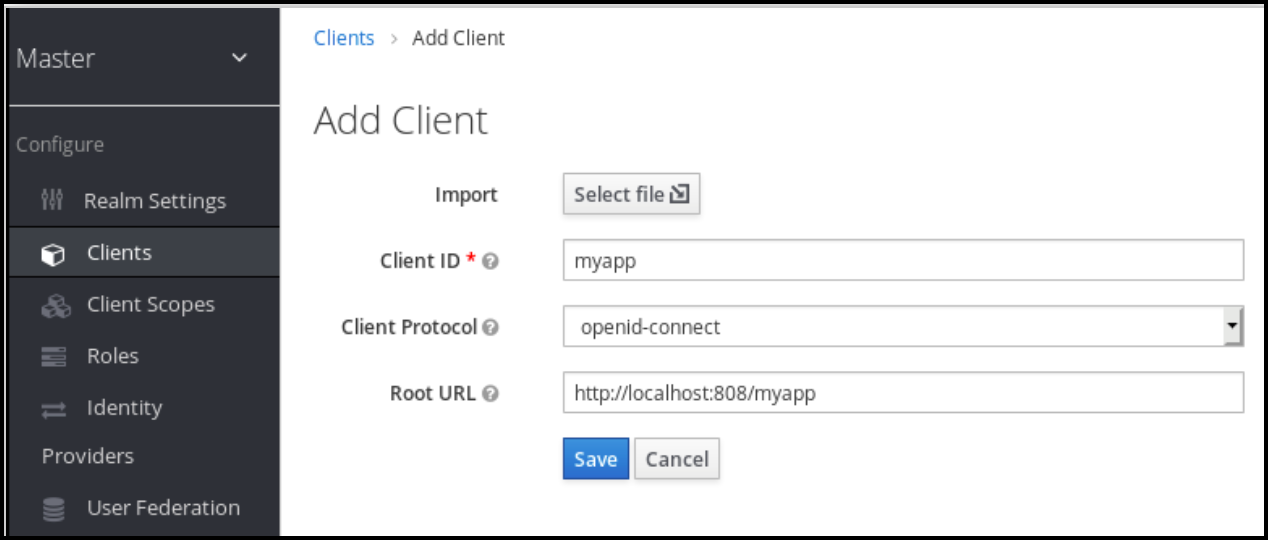
- On the Client list page click Create.
- Enter a simple alpha-numeric string as the Client ID (e.g. certifai-dev).
- Select
openid-connectas the Client Protocol ID. - Enter the base URL of Certifai as the Root URL.
- Click Save
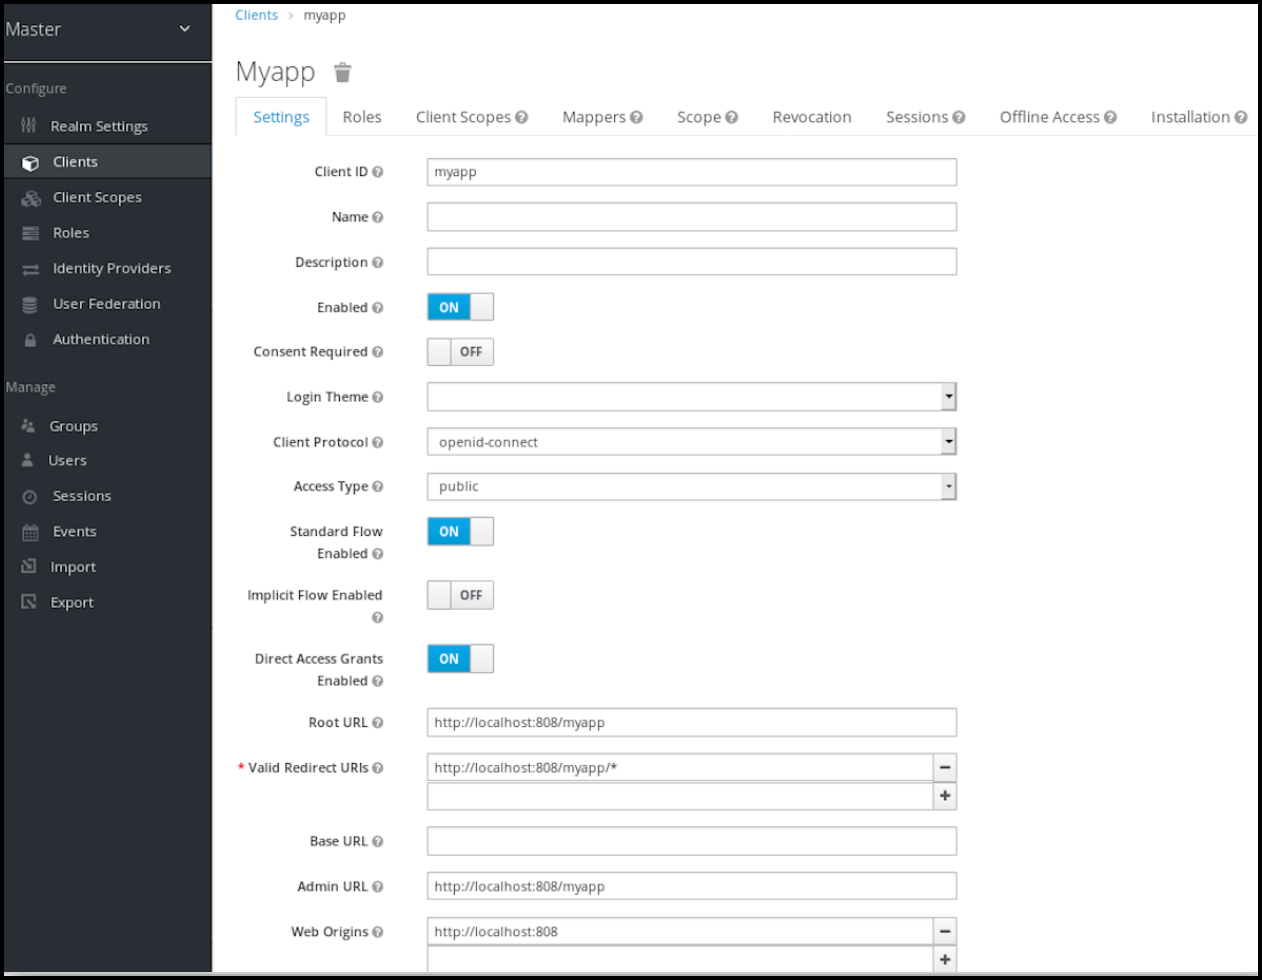
- On the Settings tab.
- Verify that the Client Protocol is
openid-connect. - Change Access Type to
confidential. - Toggle Direct Access Grants Enabled to OFF.
- Enter a Valid Redirect URL (e.g. https://dex-companyname.cognitivescale.gke.insights.ai/callback).
- Toggle Authorization Enabled to ON.
- Click Save at the bottom of the tab.
Step 2: Set up User Realm Roles or Client Roles
Option 2a: Set up User Realm Roles
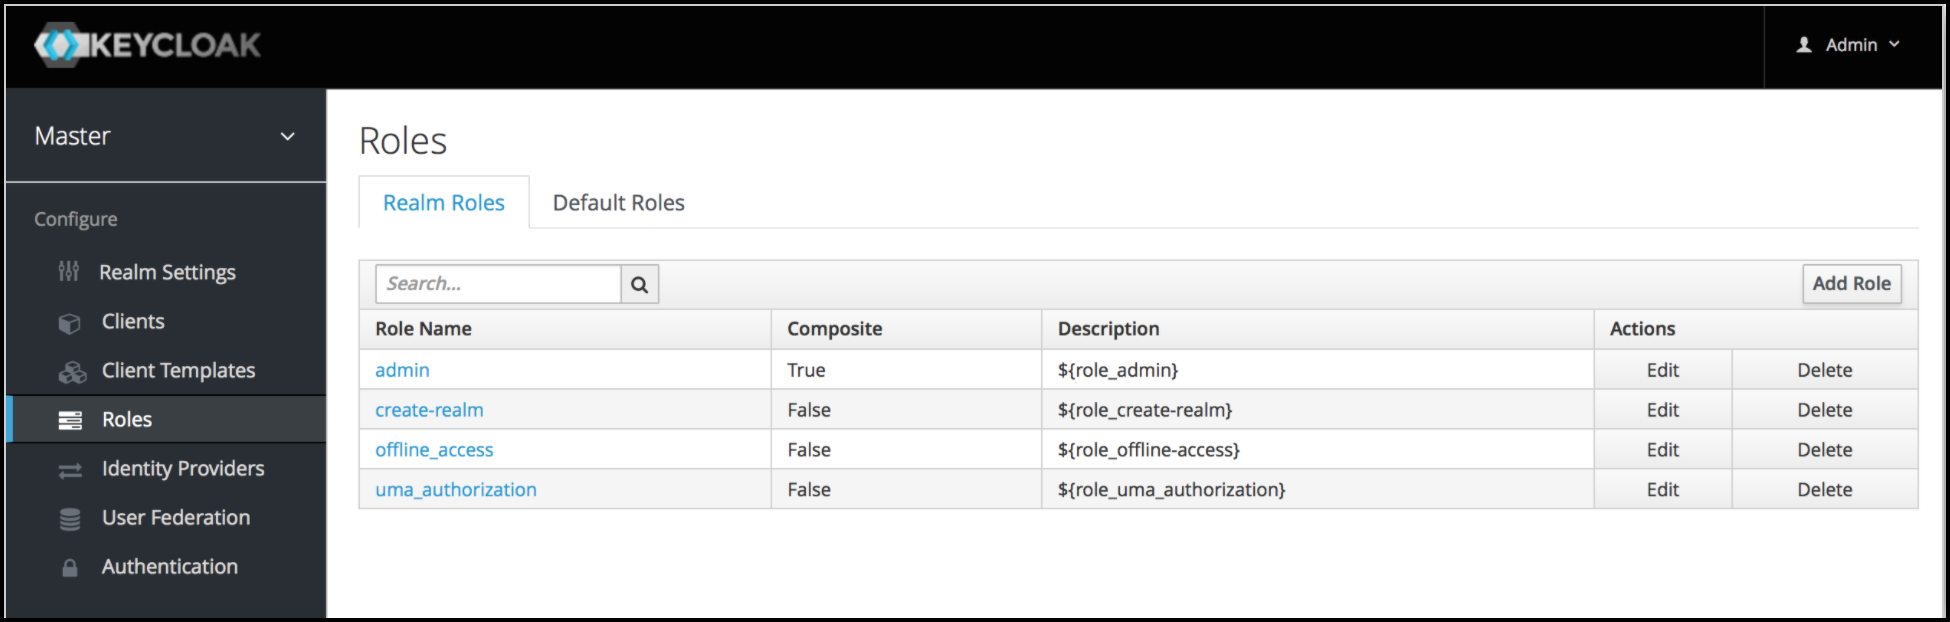
Realm-level roles are a global namespace to define your roles. You can see the list of built-in and created roles by clicking the Roles left menu item.
- In the Keycloak Admin Console click Roles in the left panel.
- Click Add Role on the role list page.
- Enter the Role name and description.
- Click Save.
Option 2b: Set up Client Roles
Client roles are basically a namespace dedicated to a client. Each client gets its own namespace. Client roles are managed under the Roles tab under each individual client. You interact with this UI the same way you do for realm-level roles.
- In the Keycloak Admin Console click Clients in the left panel.
- Click the name of a Client to open the details tabs.
- Open the Roles tab.
- Enter the Role name and description.
- Click Save.
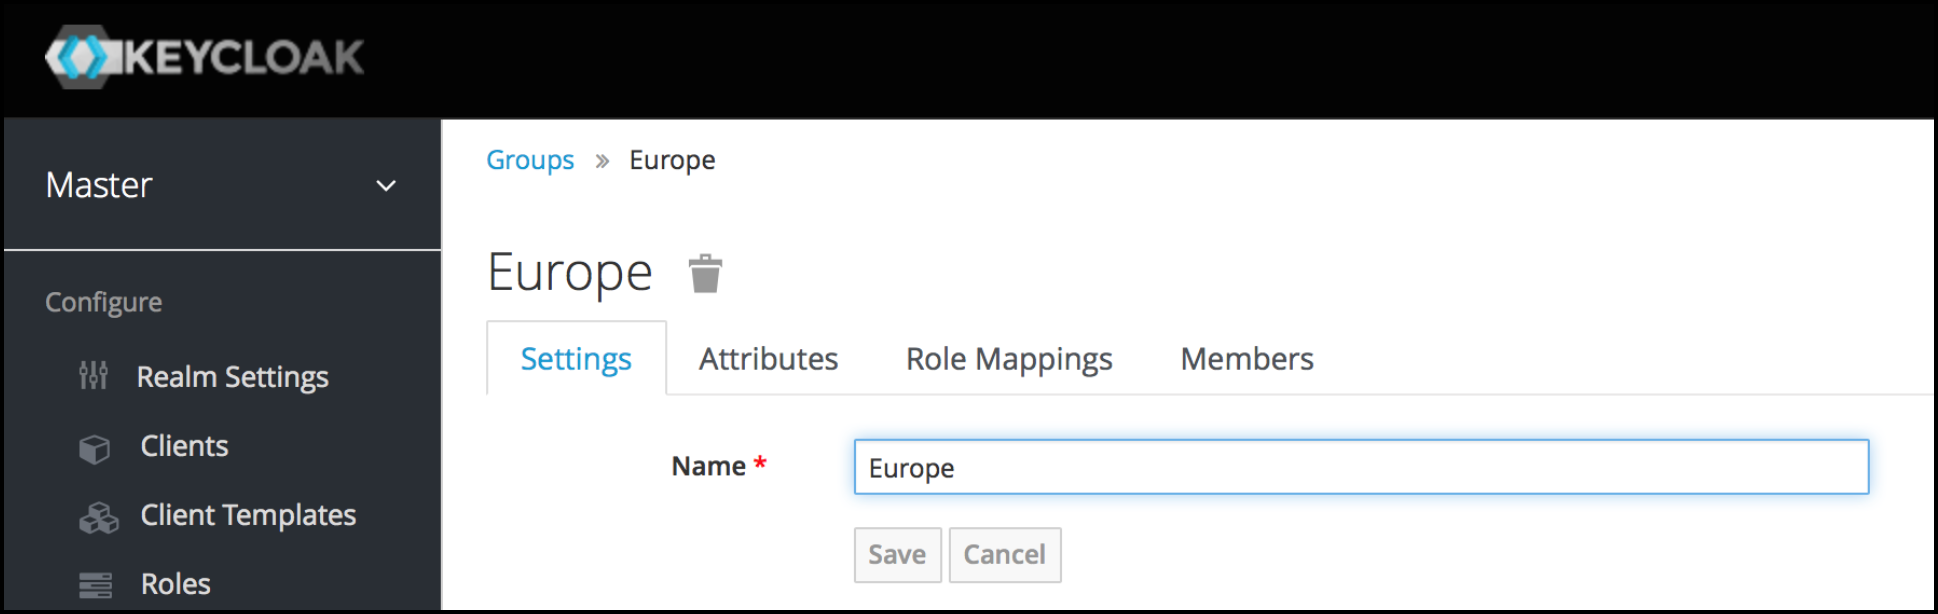
Step 3 (Optional): Set up Groups
Groups in Keycloak allow you to manage a common set of attributes and role mappings for a set of users. Users can be members of zero or more groups. Users inherit the attributes and role mappings assigned to each group.
In the Keycloak Admin Console click Groups in the left panel.
Click New.
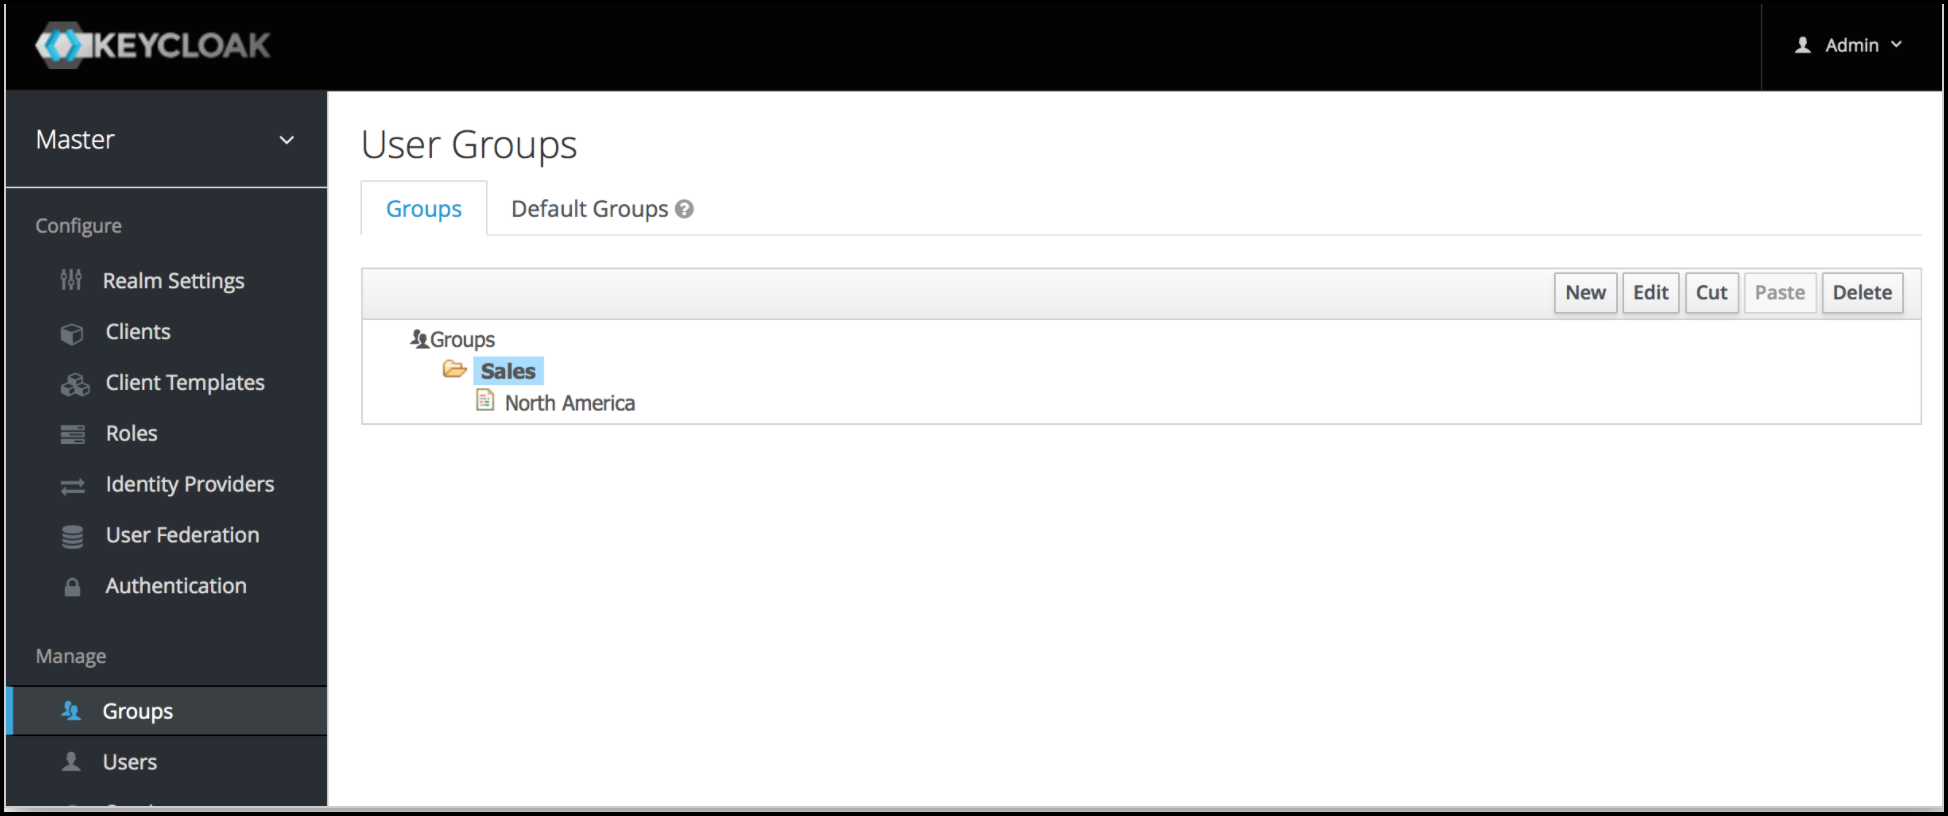
Enter Groups in a hierarchical order.
Subgroups inherit the attributes and role mappings from the parent. This applies to the user as well. So, if you have a parent group and a child group and a user that only belongs to the child group, the user inherits the attributes and role mappings of both the parent and child.
Give the group a Name.
Click Save.
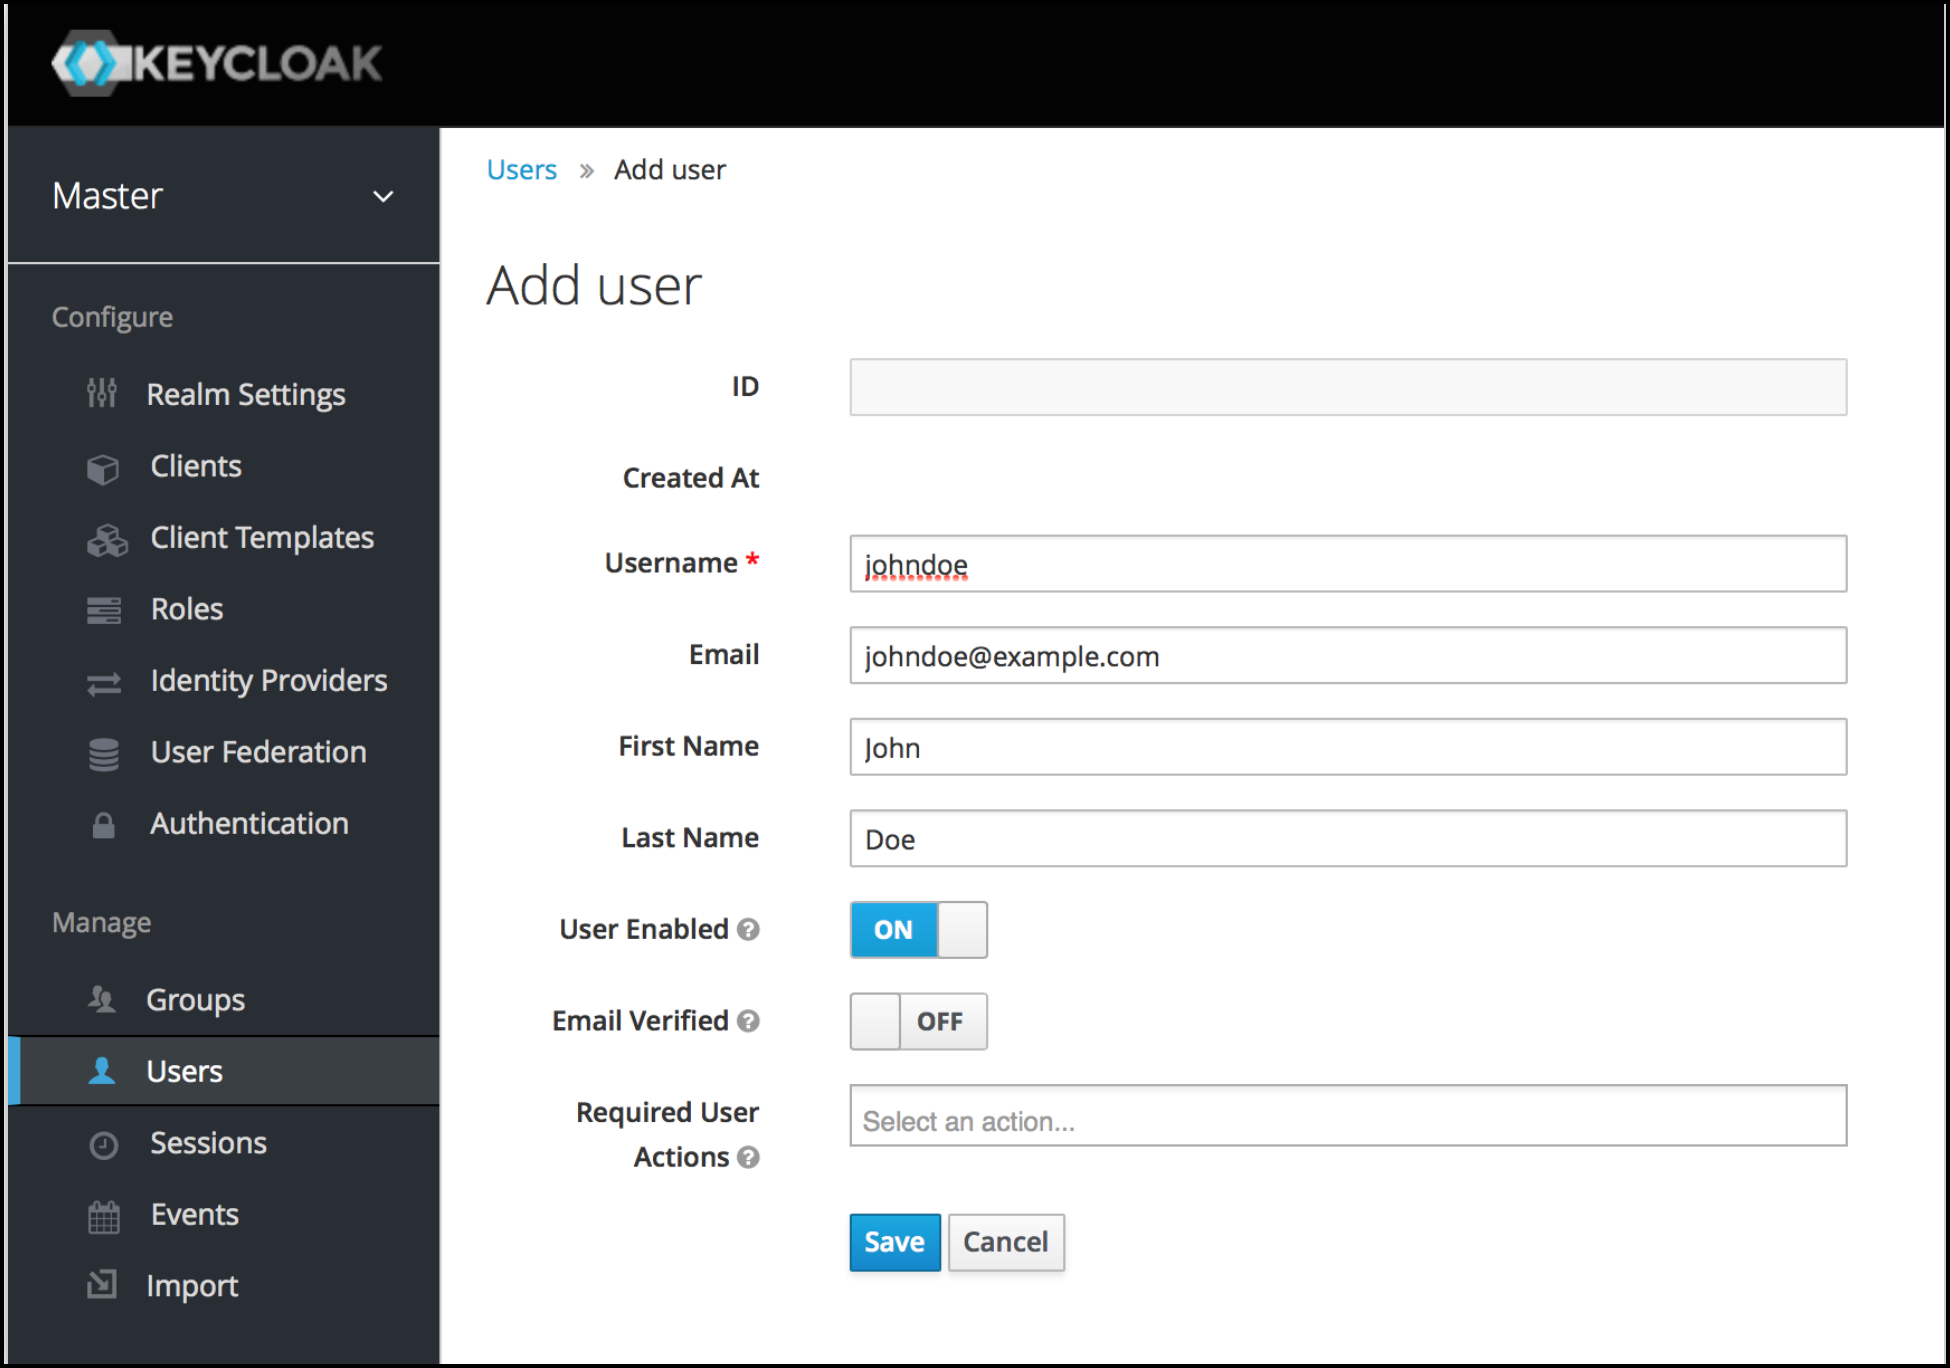
Step 4: Add a User
- Click Users in the left panel.
- Click Add User on the user list page.
- Enter username, email, first name and last name of the user. (NOTE: Email format is not verified.)
- Click Save
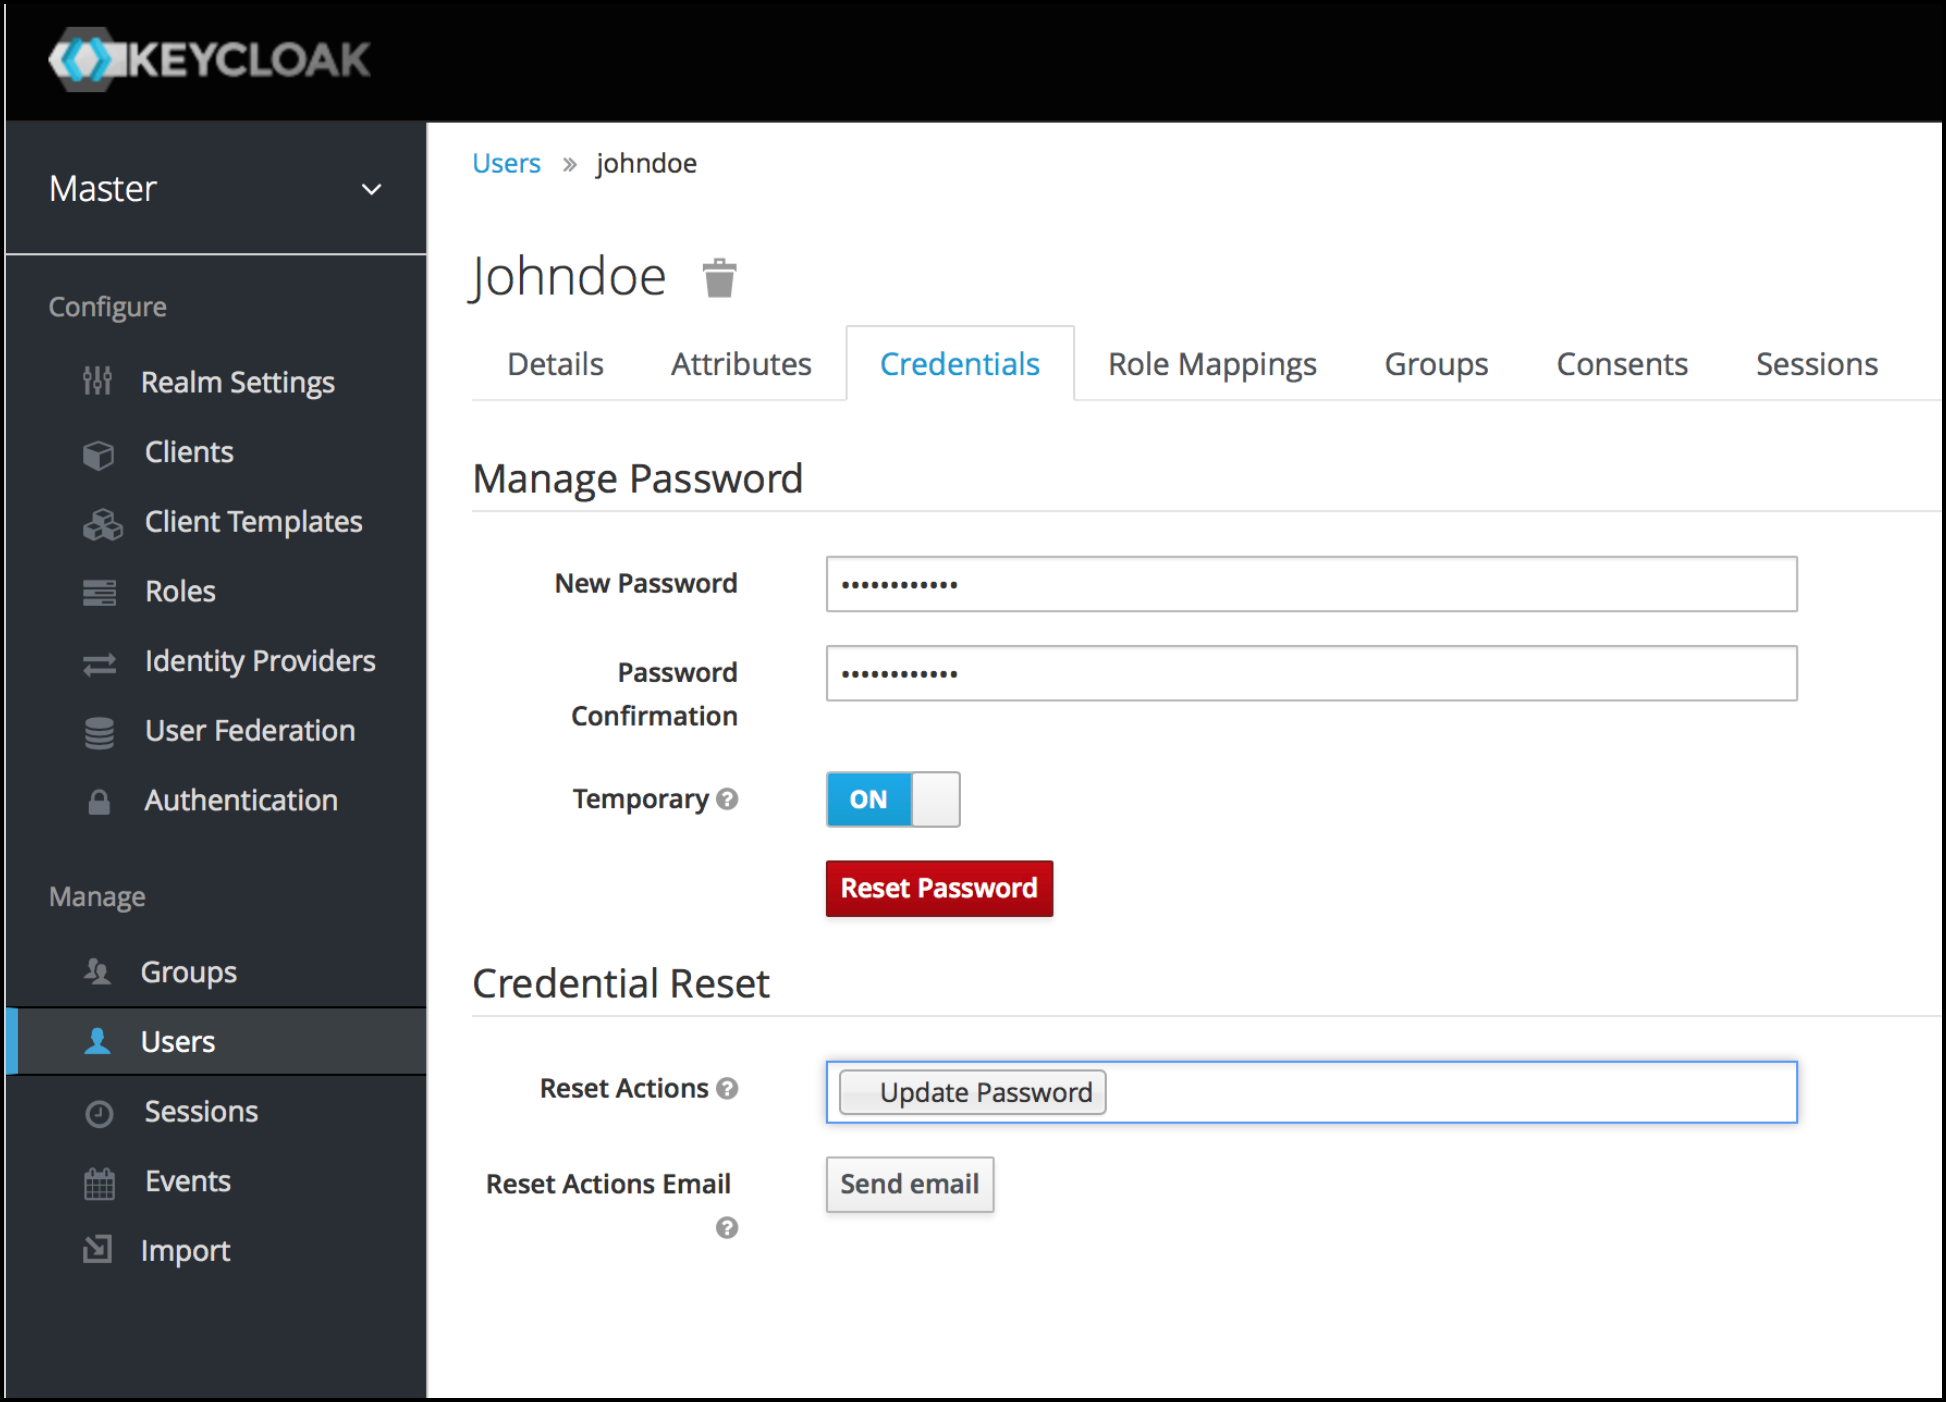
- Open the “Credentials” tab.
- Enter New Password and Password Confirmation for the user.
- Click Set Password.
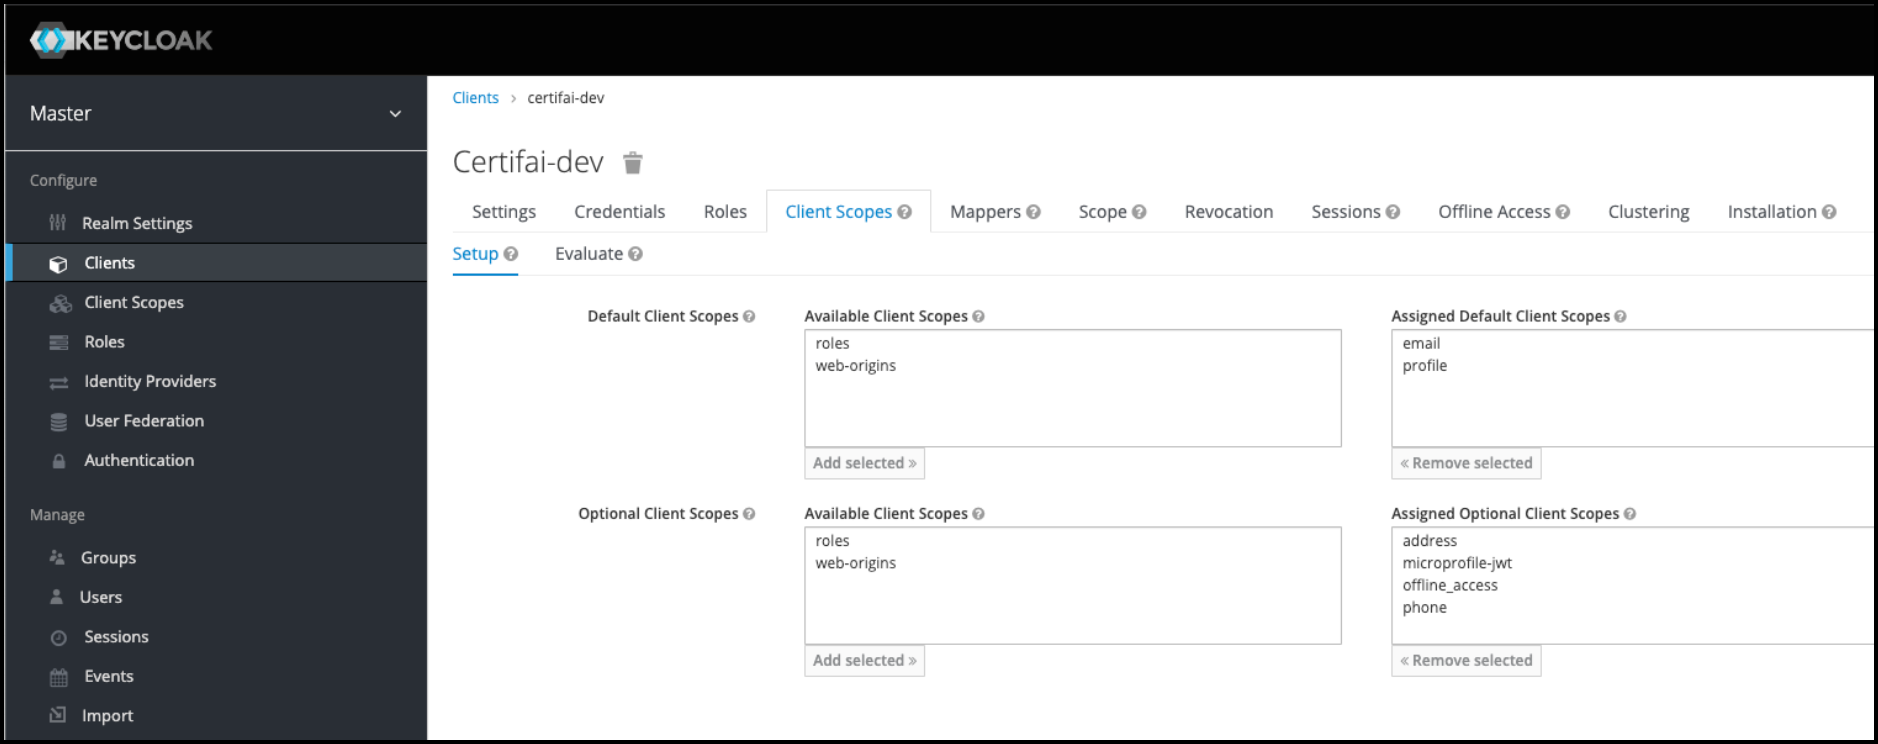
Step 5: Set up Client Scope for Groups
Keycloak allows you to define a shared client configuration in an entity called a Client Scope. Client Scopes also provide support for the OAuth 2 scope parameter, which allows a client application to request more or fewer claims or roles in the access token, according to the application needs.
- From the Client details open the Client Scopes tab.
- Click Create at the top right of the list.
- Set the assigned default client scopes to
emailandprofile.
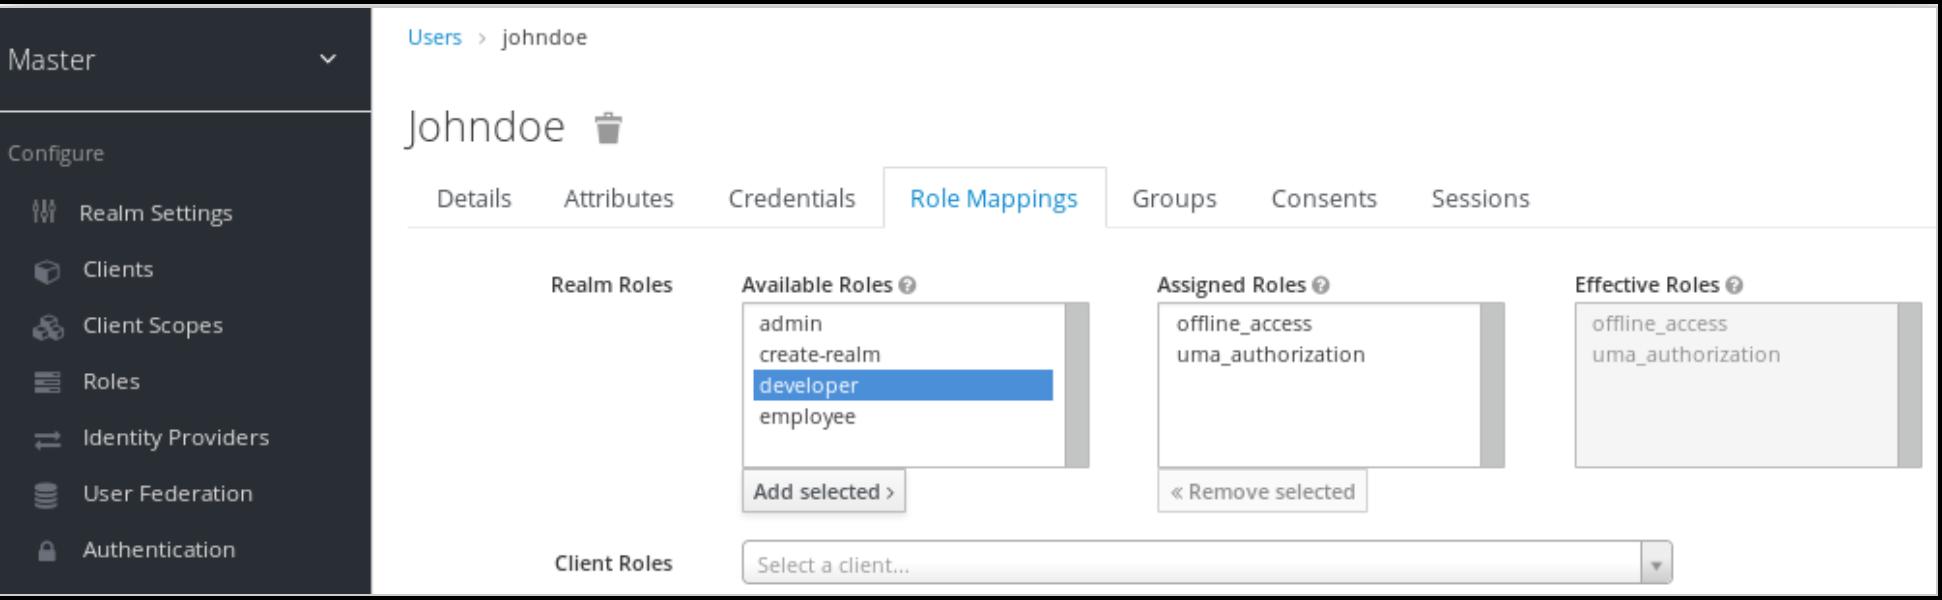
Step 6: User Role mappings
- Click Users in the left panel.
- Click a user name in the user list.
- Open the Role Mappings tab.
- Click on the role you created under Available Role to select it.
- Click Add Selected to move the role to Assigned Roles.
NOTE
If you set up Groups, go to the Groups list click on the Group name and set up the Role Mappings for the Group the same way you did for Users
Step 7: Restrict Access to a Role
To restrict Certifai access to a role, a protocol mapper needs to be defined that adds the user's roles to the ID token.
- In the Keycloak Admin Console click Clients in the left panel.
- Select a client from the list to open the details tabs.
- Open the Mappers tab.
- Click Create at the top right of the list.
- Enter a name for the mapper record.
- Select the Mapper Type of (User Realm Role, Client Role, or Groups).
- Toggle Multivalued to ON.
- Enter
groupsas the Token Claim Name. - Select Claim JSON Type -
string. - Toggle Add to ID Token to ON.
- Click Save
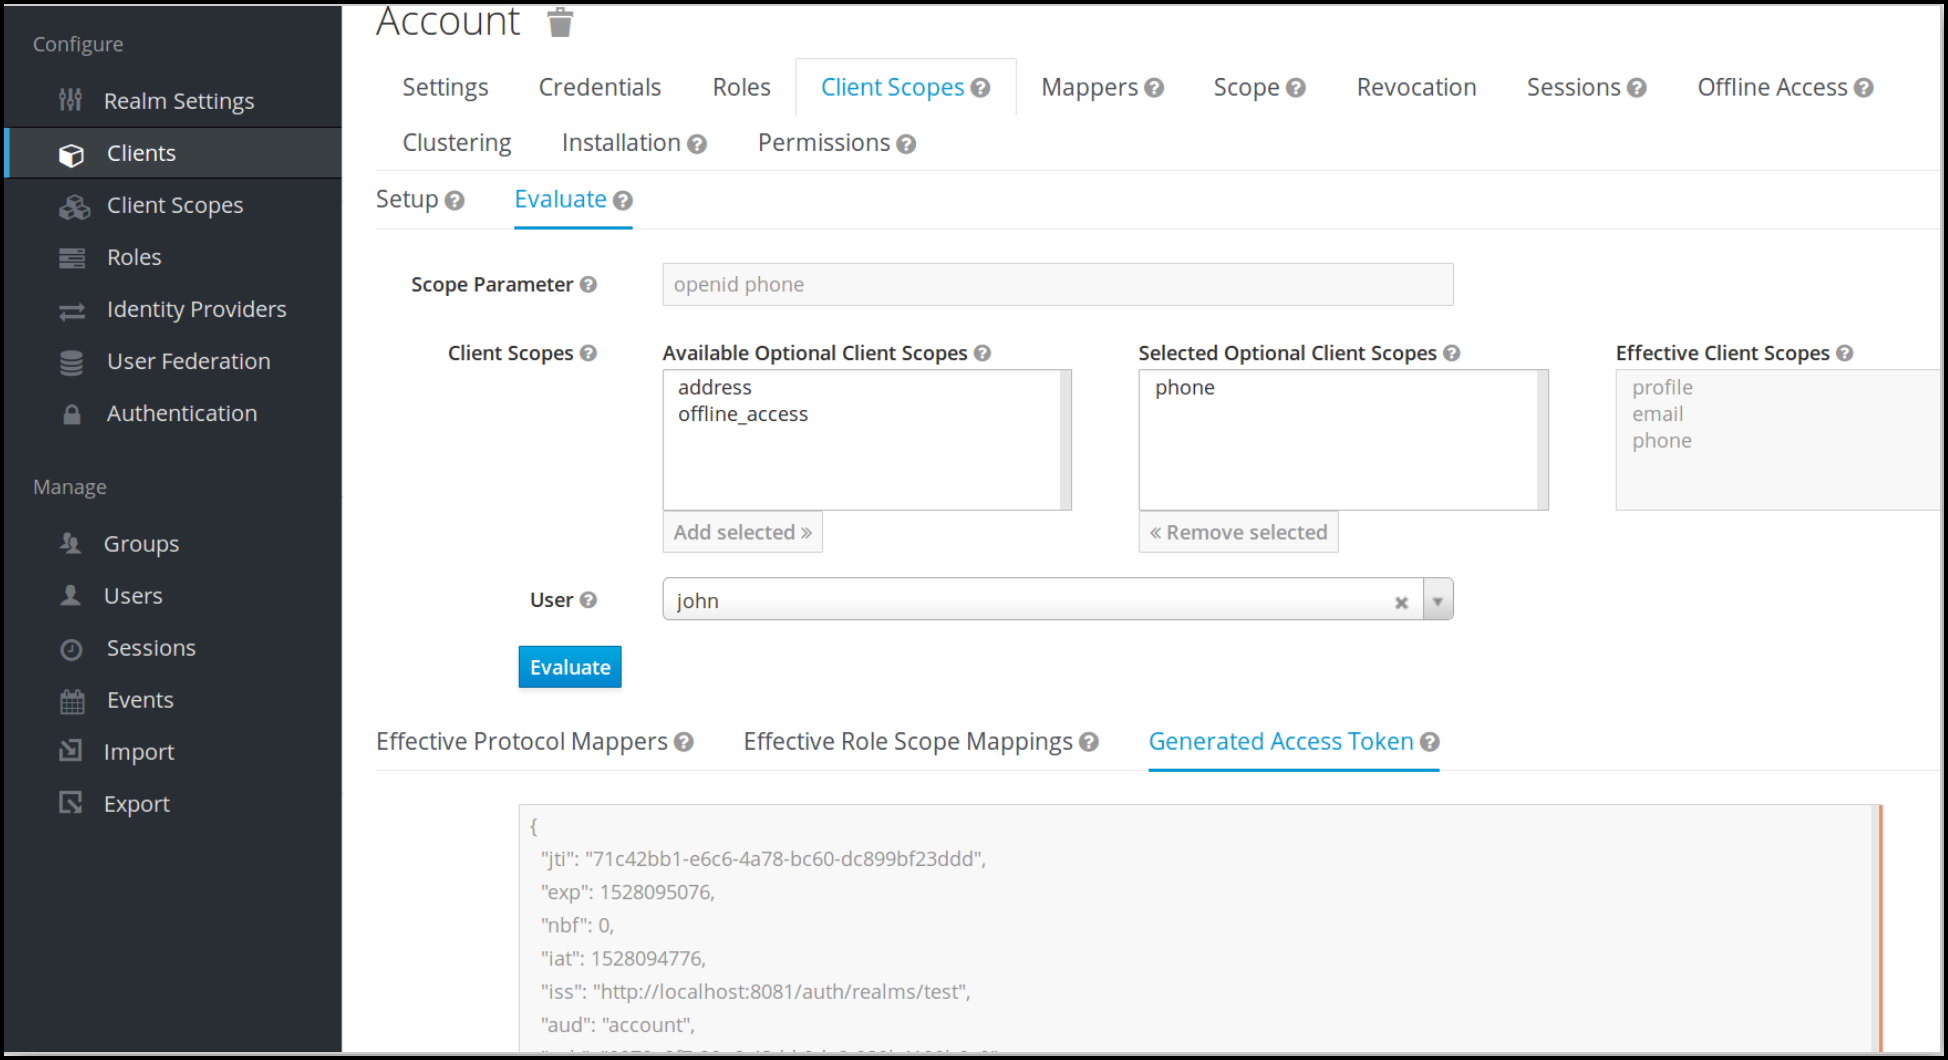
Step 8: Evaluate User Access
The goal of the Evaluation step is to verify that a user is given access to Certifai (on Keycloak). To have access the user must have an email address that has been verified.
- In the Keycloak Admin Console click Clients in the left panel.
- Select a Clients from the list to open the details tabs.
- Open the Client Scopes tab (at the top).
- Open the Evaluate sub-tab (under the top layer of tabs).
- Select the Scope Parameter you want to evaluate. (You should evaluate
emailandprofileparameters.) - Select the user that you want to evaluate for the parameter.
- Click Evaluate.
- In the results panel below open the Generated Access Token tab.
- Verify that the properties
emailandemail_verified:trueare displayed in the output panel.
Test Keycloak Setup
Keycloak implements SSO and will authenticate the user automatically with the credentials they last used to log in to any Keycloak application (subject to expiry).
For example, if you are logged into the Keycloak Admin Console when you try to reach the Certifai Console, the same credentials are used.
While testing your setup, you should to use a separate browser for testing Certifai sign on. (e.g. Guest in Chrome)
To test, enter the URL for the Certifai Console in your browser window. You are redirected to Keycloak to authenticate.
Login Troubleshooting
- If the email is not registered in Keycloak, a
Bad GatewayorService Temporarily Unavailableerror message is displayed. - If you have logged in previously and received an authorization error, clear the cookie associated with the Certifai Console and try again.
- If you have logged into Keycloak and changed user, client, or group settings (e.g. scopes, roles, mappers), log out of Keycloak to ensure that new credentials are issued.
- If the message
Unable to verify ID tokenis displayed, restart the Certifai Console by deleting the Certifai Console pod in Kubernetes.