Skills
This page describes the steps required to add Skills to an Agent.
Skills are the computational components of an Agent or a Campaign intervention action. A Skill executes an atomic unit of work and can be triggered by one or more inputs to produce one or more outputs.
Skills are the heart of an Agent. They are composed of actions and optionally models. A Skill receives input data and complete actions that result in predictive outputs. The output of a Skill either serves as the input for another Skills or comprises the output of the Agent.
Skills are stored as images to the Cortex catalog. They may be used to build Agents, as Campaign intervention actions, or run independently.
Skills may be built using:
Skill functionalities
Skills can perform any number of functionalities, such as:
- Ingesting, enriching, and storing data from a stream
- Training and testing an ML algorithm to generate an ML model
- Loading data from an external source like a file and transforming the raw data for further processing
- Extracting data features
- Invoking services
- Performing system enhancing actions (e.g. merging two other skills)
System Skills
Loaded into the Cortex system at installation are a number of Skills that can be added to Agents to perform system enhancing tasks. These Skills are "shared" or "system" skills. When added to an Agent the Skill performs a specific role:
- Agent invoke: Invokes an agent, passing the response as the payload to the next skill
- Merge inputs: Merges inputs to a single output. Only one request is made to downstream skills or outputs. The payload is returned as an array.
Skill types
Cortex supports three types of skills:
- Jobs: Used to process high volumes of data that would normally consume long-term memory if run in the foreground, as well as for running programs that require little to no user interaction and are required to run on a regular basis.
- Bulk-batch predict (job) template: One of the Skill Building template options. The template uses a pre-defined Spark image with its dependencies. When the Skill is executed, Spark is used to kick off a job. The Bulk-batch predict Skill is used to process large amounts of data. (e.g. deploying interventions (mini-batches) for Cohorts with over 40k Profiles)
- Daemons: Web servers typically used for ML predictions and serving inquiries. Once started, it runs indefinitely.
- External API: Provides access to external APIs, where you specify the API URL, path, headers, and method in the skill definition.
Synapses
The output of every Skill can be connected to other Skills via synapses. This output is displayed on the Synapse Board, where other Skills can subscribe to consume that output as an input.
Synapses:
- Are data outputs that are built into Skill definitions.
- Are added to the Synapse Board when the Skill is added to an Agent.
- Provide the means to link Skills together in an Agent. The output of one Skill in the Synapse Board can be connected to another Skill as an input.
- Are not available for all Skills; some Skills only provide access to inputs.
- Output paths to the Synapse Board from a Skill are not editable and do not require mapping, because the data output is defined in the Skill.
The example below shows Skill outputs displayed on the Synapse Board.

Inputs and outputs
Each Skill is defined to work with particular input and output messages.
After adding a Skill to an Agent, when you select the Skill, the Properties panel displays the supported input and output messages. Each message is composed of the allowable field names and data types.
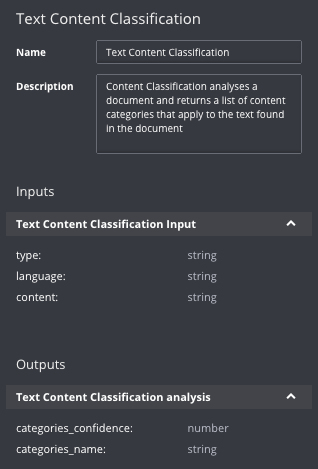
The example below shows a Skill that supports a single input message, "Text Content Classification Input", that has three fields: type, language, and content. It also supports a single output message, "Text Content Classification Analysis", that has two fields: categories-confidence and categories-name.
When you create the message flow through the Agent, you can link a Skill that consumes particular message types to another Skill or a service that emits the same data types, or you can manage the match though data mapping at the Data Quality Indicator junctions.
Skill Properties panel
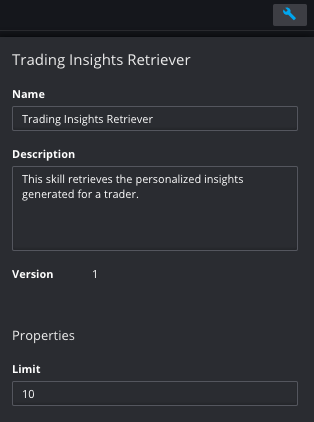
Select a Skill in the Agent Composer honeycomb to expose the Skill properties in the Properties Panel on the far right panel.
Name: URL-friendly name given to the Skill. (Names must be 20 characters or fewer)
Version: The system-generated version of the Skill, which is incremented each time the Skill is changed.
Skill Title: (editable) Human-readable name for the Skill
Description: (editable) Description of what the Skill does
Inputs (to the Skill): Schema required by each of a Skill's actions.
Outputs (to the Skill): Schema of the output message produced by a Skill's actions.
Properties: (editable) Identifying elements of a Skill (e.g. Limit); a key use of properties is to customize the behavior of Skills within a particular agent; many Skills provide a set of properties that you can set, along with default values.
Working with Properties expressed as Arrays
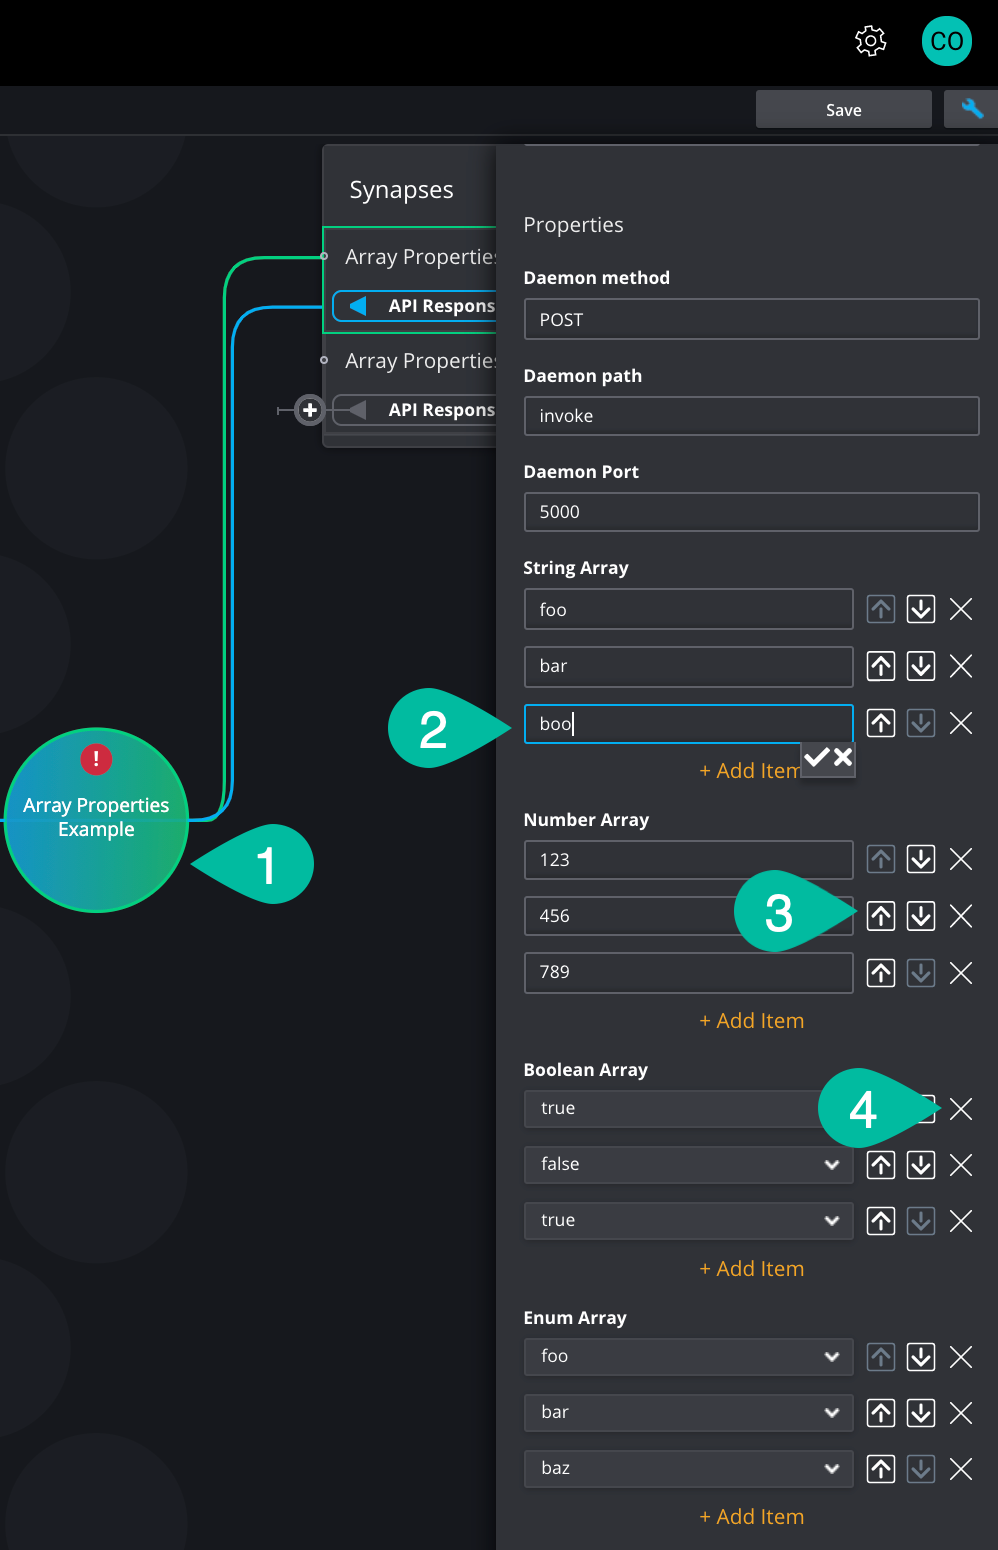
In the Fabric Console you can set properties expressed as arrays. Items can can be added, removed, or moved within the array.
Select a Skill in the Agent Composer honeycomb to expose the Skill properties in the Properties Panel on the far right panel.
Under properties the array types are listed.
To add items to the array type:
- a. Click
+ Add Itemunder the listed items. - b. An empty field is added to the list.
- c. Enter the value for that item of the array.
- d. Click the checkmark to save it.
- a. Click
To reorder the items in the array: Click the up and/or down arrows to move the items within the array.
To remove items from the array: Click the X beside the array item you wish to remove.
In the skill.yaml the properties expressed as arrays are formatted as follows:
camel: 1.0.0
name: array-props
title: Array Properties Example
description: Array Properties Example
...
properties:
  ...
  - name: stringArray
    title: String Array
    description: ...
    required: true
    type: Array
    arrayType: String
    defaultValue: ["foo", "bar", "baz"]
  - name: numberArray
    title: Number Array
    description: ...
    required: true
    type: Array
    arrayType: Number
    defaultValue: [123, 456, 789]
  - name: booleanArray
    title: Boolean Array
    description: ...
    required: true
    type: Array
    arrayType: Boolean
    defaultValue: [true, false, true]
  - name: enumArray
    title: Enum Array
    description: ...
    required: true
    type: Array
    arrayType: Enum
    defaultValue: ["foo", "bar", "baz"]
    validValues: ["foo", "bar", "baz"]
  ...
Add Skills to an Agent
Prerequisites
Skills must be added to the project.
Add Skill steps
Open an existing Agent or create a new one.
In the honeycomb center of the design view, hover over any cell.
Click the plus sign below Add Skill to open the Add Skills dialog.
A list of Skills is displayed in the center panel. Your Skills are further filtered by category tags in the left panel. You can also enter a Skill name in the search field to find the Skill you want to add.
Select a Skill.
The Skill's properties are displayed in the right panel.
Click Add Skill.
The Skill is added to the center grid, and its output actions are added to the Synapse panel. When you click on the Skill, its properties are displayed in the Properties panel.
In the Properties panel you may edit the Skill Name, Description, and any properties configured for the Skill.
- Click in the field you want to modify.
- Make desired changes.
- Click the checkmark under the field or click the X to revert to the original entry.
:::caution
To use Skills built to use JDBC Connections, Connection Type and Connection Name Properties must be set. Details here.
:::
Assign Secrets in Skill Properties
Secrets, key-value pairs that are created in Admin Console and CLI, are displayed as optional Skill properties in Agent Composer.
The Secret dropdown is only displayed when a Skill contains the definition secure: true in the skills.yaml file.
Select the secret that the Skill requires for secure access.
Next Steps
After you have added Skills to an Agent:
- Add the inputs and outputs to the Skill/Agent.
- Configure the message flow by connecting inputs and outputs